
Calculator
카테고리: Project
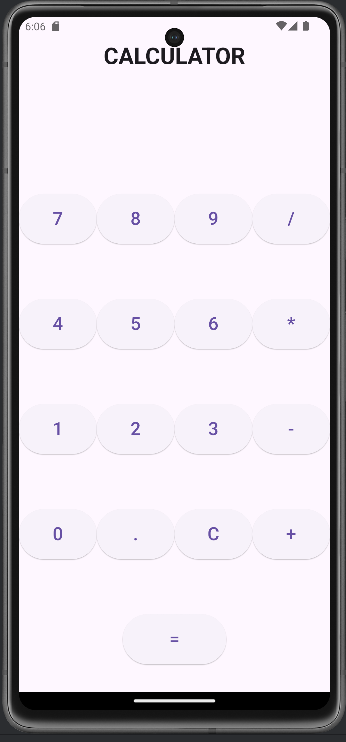
Flutter와 GetX를 활용하여 UI가 예쁜 계산기를 만드는 예제를 소개하겠습니다. 이 예제에서는 GetX 상태 관리 패키지를 사용하여 상태를 관리하고, Flutter의 위젯을 활용해 디자인된 계산기 앱을 구현합니다.
1. 프로젝트 설정
먼저 Flutter 프로젝트를 생성하고 get 패키지를 pubspec.yaml 파일에 추가합니다:
dependencies:
  flutter:
    sdk: flutter
  get: ^4.6.5 # GetX 패키지 버전
2. 모델 및 컨트롤러 설정
calculator_controller.dart
계산기 로직과 상태 관리를 위한 GetX 컨트롤러를 정의합니다.
import 'package:get/get.dart';
import 'package:expressions/expressions.dart'; // 수식 평가를 위한 패키지

class CalculatorController extends GetxController {
  var displayText = ''.obs; // 현재 디스플레이 텍스트를 옵저버블 변수로 설정

  void append(String value) {
    displayText.value += value;
  }

  void clear() {
    displayText.value = '';
  }

  void evaluate() {
    try {
      // Expressions 패키지를 사용하여 수식을 평가
      final expression = Expression.parse(displayText.value);
      final evaluator = const ExpressionEvaluator();
      final result = evaluator.eval(expression, {});
      displayText.value = result.toString();
    } catch (e) {
      displayText.value = 'Error';
    }
  }
}
3. UI 구성
main.dart
애플리케이션의 진입점입니다. GetX 컨트롤러를 초기화하고, 계산기 UI를 정의합니다.
import 'package:flutter/material.dart';
import 'package:get/get.dart';
import 'calculator_controller.dart';

void main() {
  runApp(MyApp());
}

class MyApp extends StatelessWidget {
  @override
  Widget build(BuildContext context) {
    return GetMaterialApp(
      title: 'Calculator',
      theme: ThemeData(
        primarySwatch: Colors.blue,
        visualDensity: VisualDensity.adaptivePlatformDensity,
      ),
      home: CalculatorScreen(),
    );
  }
}

class CalculatorScreen extends StatelessWidget {
  final CalculatorController controller = Get.put(CalculatorController());

  @override
  Widget build(BuildContext context) {
    return Scaffold(
      appBar: AppBar(title: Text('Calculator')),
      body: Column(
        children: [
          Obx(() => Container(
            padding: EdgeInsets.symmetric(vertical: 24.0, horizontal: 16.0),
            alignment: Alignment.centerRight,
            child: Text(
              controller.displayText.value,
              style: TextStyle(fontSize: 48, fontWeight: FontWeight.bold),
            ),
          )),
          Expanded(
            child: Column(
              children: [
                Expanded(
                  child: Row(
                    children: [
                      _buildButton('7'),
                      _buildButton('8'),
                      _buildButton('9'),
                      _buildButton('/'),
                    ],
                  ),
                ),
                Expanded(
                  child: Row(
                    children: [
                      _buildButton('4'),
                      _buildButton('5'),
                      _buildButton('6'),
                      _buildButton('*'),
                    ],
                  ),
                ),
                Expanded(
                  child: Row(
                    children: [
                      _buildButton('1'),
                      _buildButton('2'),
                      _buildButton('3'),
                      _buildButton('-'),
                    ],
                  ),
                ),
                Expanded(
                  child: Row(
                    children: [
                      _buildButton('0'),
                      _buildButton('.'),
                      _buildButton('C'),
                      _buildButton('+'),
                    ],
                  ),
                ),
                Expanded(
                  child: Row(
                    children: [
                      Expanded(child: Container()), // 빈 공간
                      _buildButton('='),
                      Expanded(child: Container()), // 빈 공간
                    ],
                  ),
                ),
              ],
            ),
          ),
        ],
      ),
    );
  }

  Widget _buildButton(String text) {
    return Expanded(
      child: ElevatedButton(
        onPressed: () {
          if (text == 'C') {
            controller.clear();
          } else if (text == '=') {
            controller.evaluate();
          } else {
            controller.append(text);
          }
        },
        child: Text(
          text,
          style: TextStyle(fontSize: 24),
        ),
        style: ElevatedButton.styleFrom(
          padding: EdgeInsets.all(16.0),
        ),
      ),
    );
  }
}
설명
CalculatorController:displayText는 현재 계산기 화면에 표시되는 텍스트를 관리합니다.append,clear,evaluate메서드로 입력을 추가하고, 화면을 지우고, 수식을 계산합니다.
- UI:
CalculatorScreen은 계산기 UI를 구성합니다.Obx위젯을 사용하여displayText의 변화를 감지하고 화면을 업데이트합니다._buildButton메서드는 계산기 버튼을 생성하고 클릭 이벤트를 처리합니다.
이 예제는 기본적인 계산기 기능을 구현한 것이며, 디자인을 더 개선하거나 추가 기능을 구현할 수 있습니다. Flutter의 강력한 UI 구성 기능을 활용해 더 복잡한 사용자 인터페이스와 기능을 추가해 보세요.
댓글 남기기